
ESP32-S3 programming …
Before the actual programming of the EPS32 microcontroller can begin, the necessary prerequisites must be created. We use the popular Arduino IDE development environment as software. It offers extensive libraries for various microcontrollers and has a large user base that provides numerous projects as templates. Arduino IDE is also available for Windows, Linux and MacOS and can therefore be used on practically any PC. For our example project, we are using Arduino IDE 1.8.19, which has already been superseded by version 2.3, but as already mentioned, it is particularly advisable for beginners to use tested versions rather than blindly trying out the latest version, where one or other library may no longer work.
Arduino IDE can be downloaded free of charge here.
Setting up the Arduino IDE …
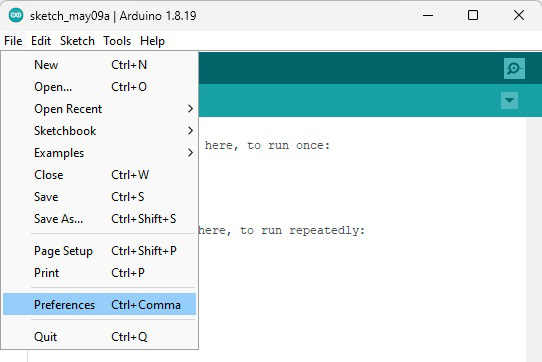
First of all, the prerequisite for programming ESP32 controllers must be created in Arduino IDE. To do this, the address of the required board library must be entered via the File menu under “Preferences”.
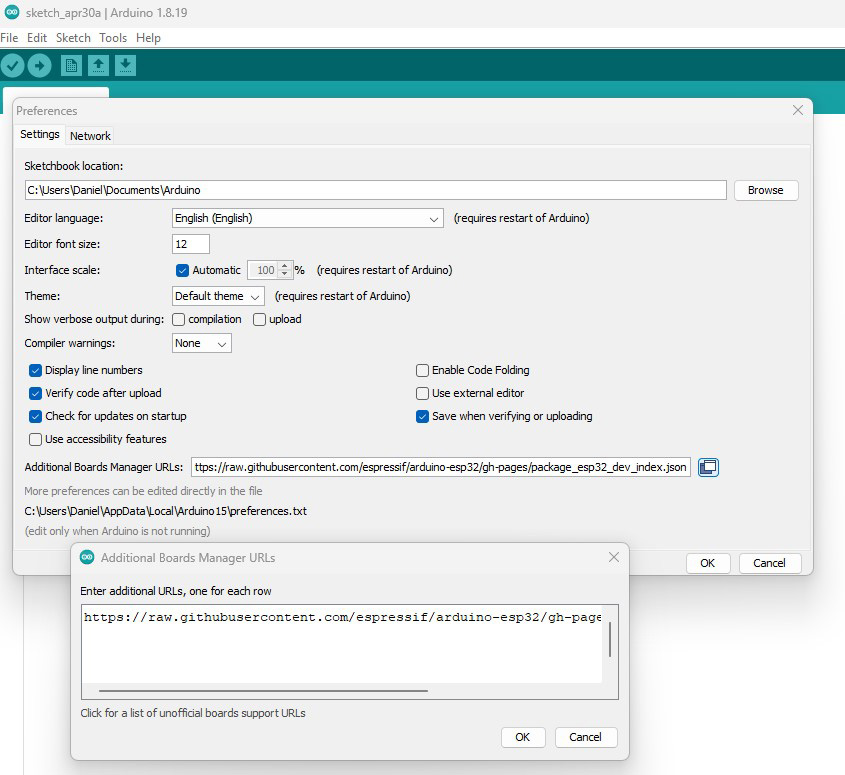
There we enter the following address under the “Settings” tab in the “Additional Boards Manager URLs” field, then confirm with “OK” and close the window:
https://raw.githubusercontent.com/espressif/arduino-esp32/gh-pages/package_esp32_dev_index.json
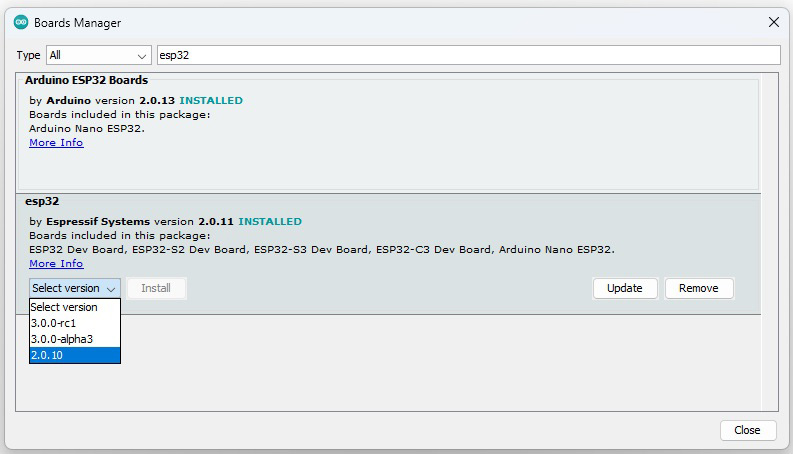
Now open the board manager via the “Tools” menu and add the library for our ESP32-S3 Dev Board.
We enter “esp32” in the search bar at the top and a short moment later the field “esp32 by Espressif Systems” appears at the bottom, where we select version 2.0.11 and click “Install”. Arduino IDE then automatically starts downloading the board drivers and installs them.
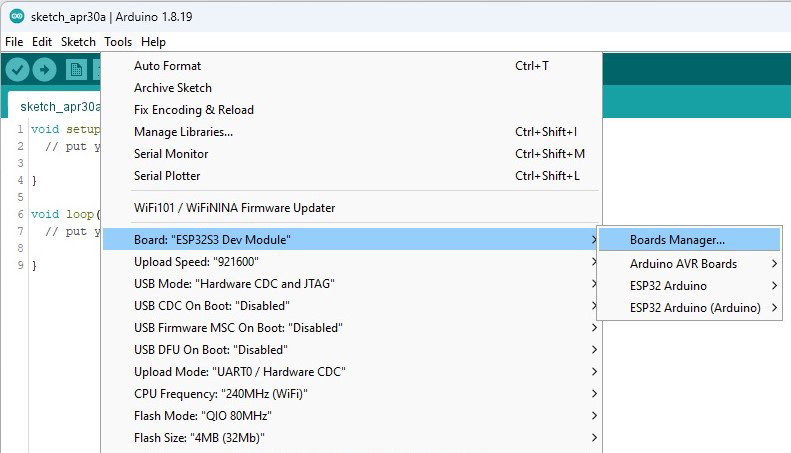
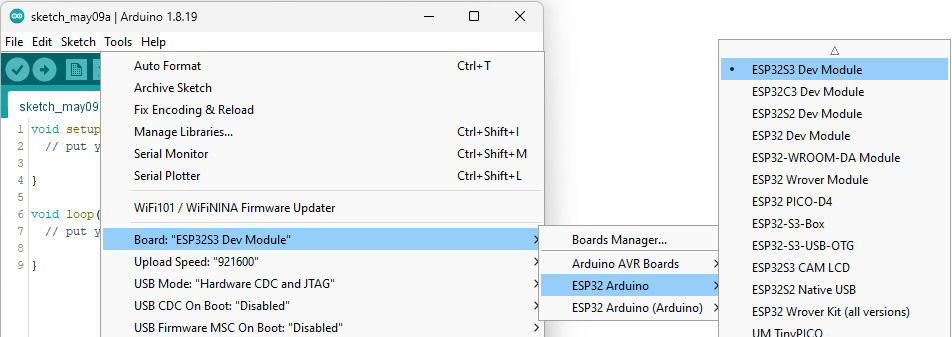
Our ESP 32 board is now available for programming in the Arduino IDE and can be selected immediately via the Tools menu. The correct entry is “ESP32S3 Dev Module”.
As there are many settings for this EPS32 board, we first need to make sure that it is configured correctly for our project. The following picture shows all the correct settings. However, the port can only be selected after the ESP32 board has been connected to the PC via USB cable. Of course, the port where the ESP board is displayed must be selected.

Adding program libraries …
The basic requirements are now in place to program the EPS32-S3 board using the Arduino IDE. However, further libraries need to be added for our departure display, as our project requires a web server, wifi connection and internet access. For the most part, we can do this via the Arduino IDE Library Manager, but one particular library needs to be added manually. We will start with the library to be added manually.
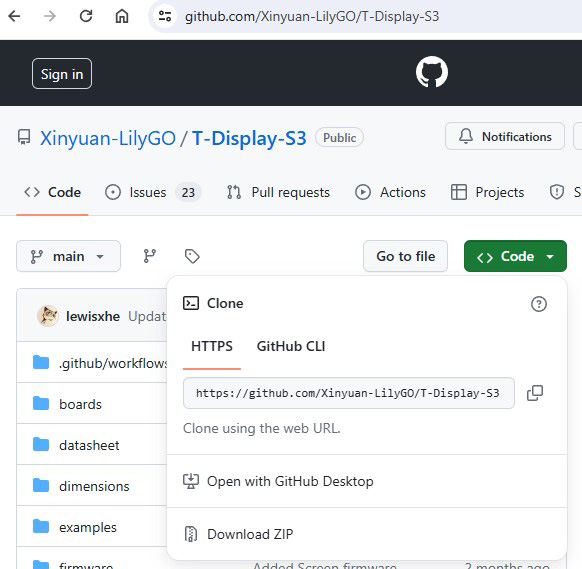
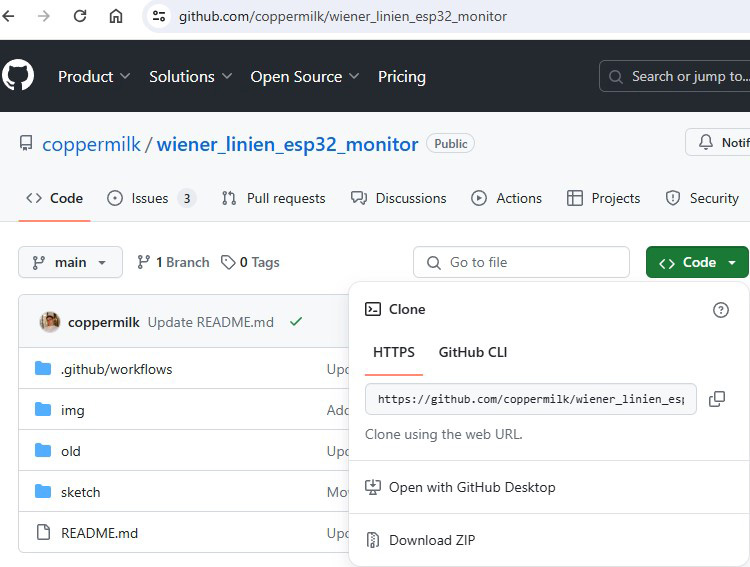
Now we download the necessary file “T-Display-S3-main.zip” via the following link T-Display-S3 using the green “Code” button:
We unpack the “T-Display-S3-main” folder and all its contents into the Arduino IDE library folder, which is located in the user folder under “Documents\Arduino\Libraries”.
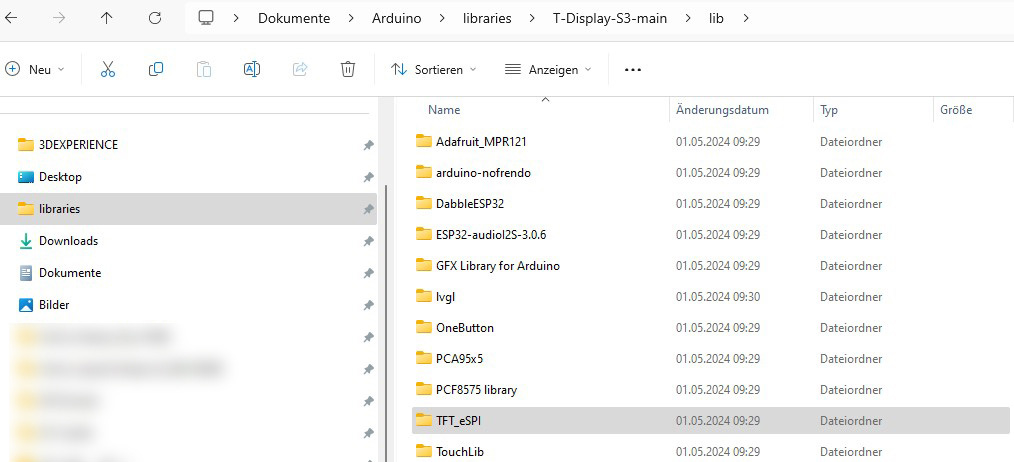
Now we need to open the T-Display-S3-main folder and go to the “libraries” subfolder. From there, the “TFT_eSPI” folder and its entire contents must be copied to the Arduino library folder.
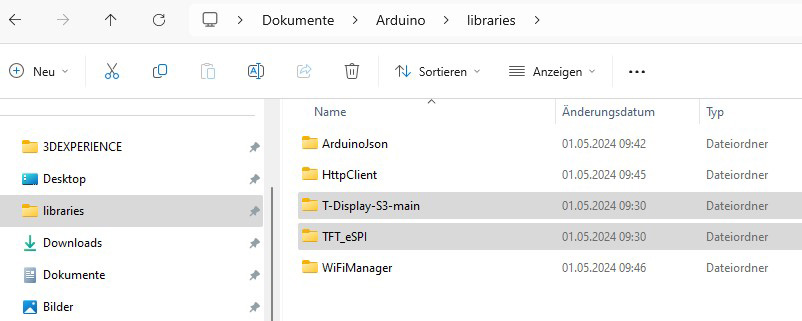
The following 2 folders must now be located in the Arduino library: “T-Display-S3-main” and “TFT_eSPI”.
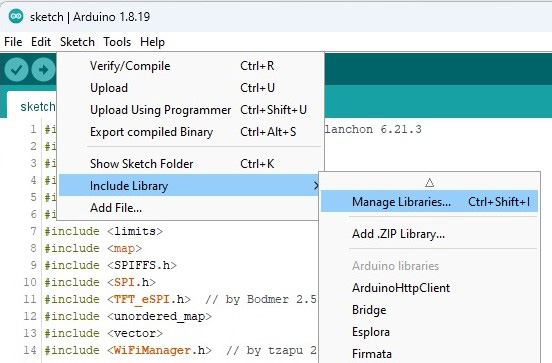
This completes the difficult part and we can use the Arduino IDE Library Manager to add the remaining missing libraries. You can access the Library Manager again via the Tools menu.
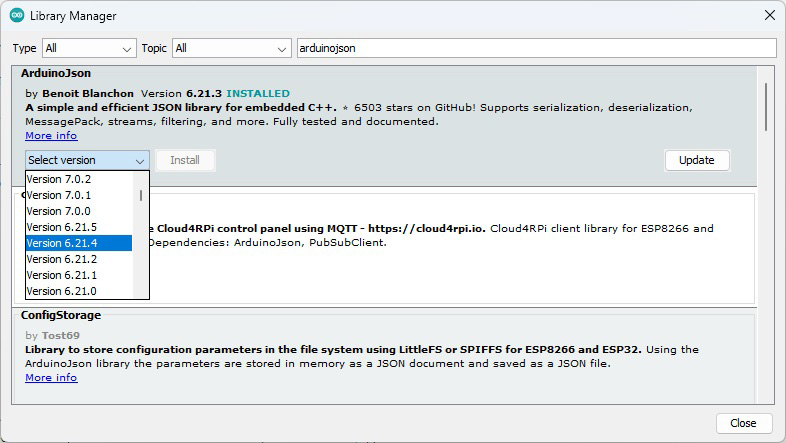
We enter “ArduinoJson” in the search bar and install version 6.21.3.
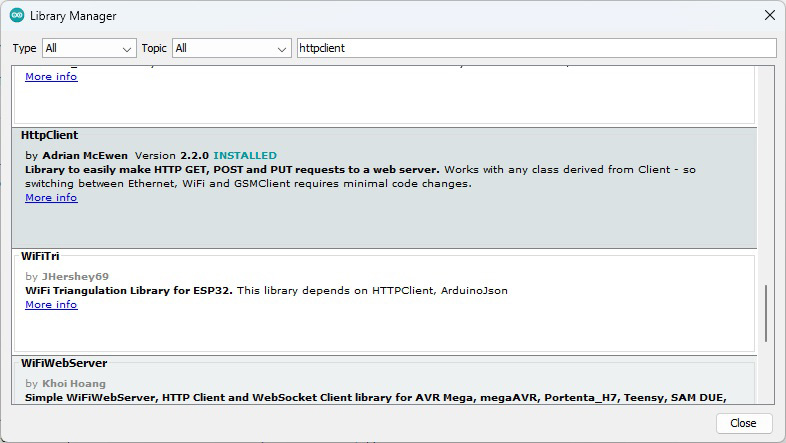
Then install the HTTP client from Adrian McEwen in version 2.2.0.
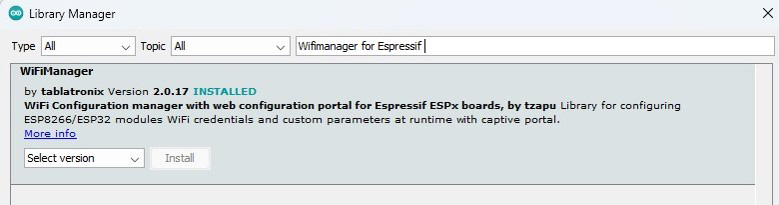
Also install “Wifimanager for Espressif” from tablatronix in version 2.0.17.
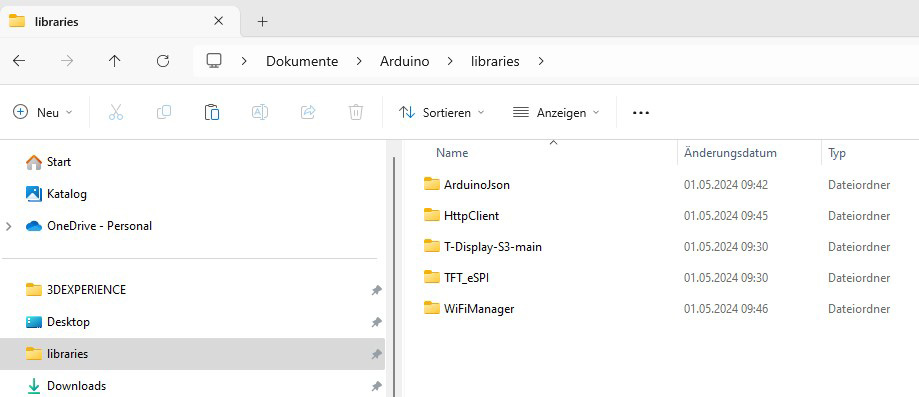
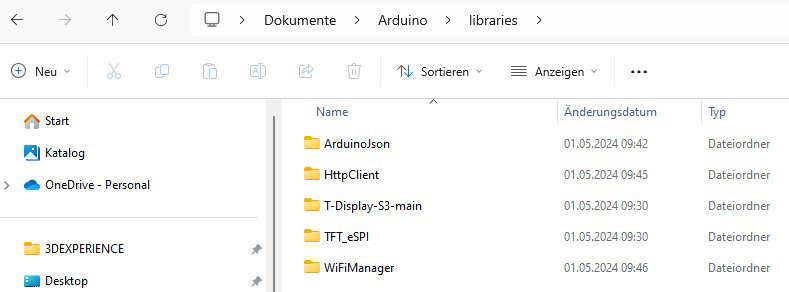
The following subfolders should now be present in the Arduino library folder.
– ArduinoJson
– HttpClient
– T-Display-S3-main
– TFT_eSPI
– WiFiManager
If the folders have different names, a wrong library has probably been installed, which will result in the subsequent program compilation not working.
Now only one thing is missing, the program code for our project. We download this again at the following address via the green “Code” button in the form of a zip file: Vienna Lines ESP32 Monitor Download
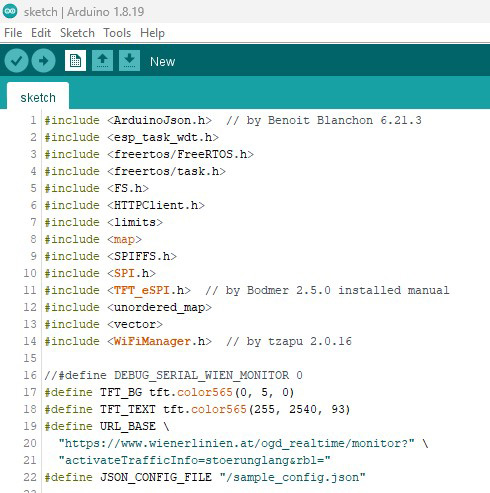
We unzip the content to any folder where we can easily find it again. In the unzipped folder there is a subfolder “Sketch”, which we open. Double-click on the “sketch.ino” file to open the program code in Arduino IDE. It is possible that certain error messages regarding “invalid library found” or “Ignoring sketch with bad name” will be displayed and have to be confirmed, but this has no effect on our project.

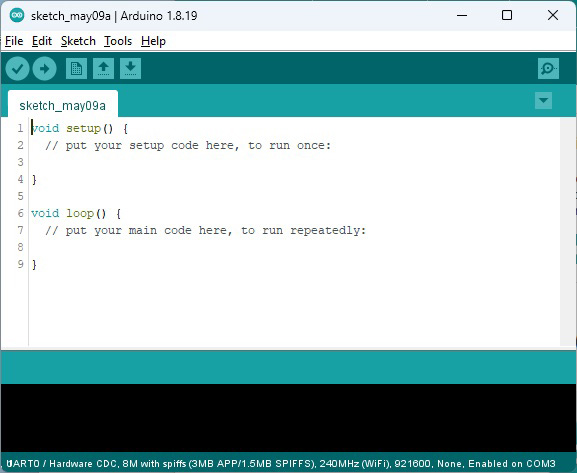
The first lines of code should look like this …
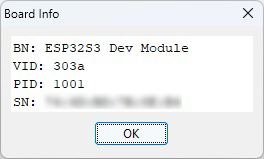
At this point at the latest, the ESP32 should be connected to the PC via USB cable and a small test should be carried out. Select the Board Info command via the Tools menu and you will get the following display on the PC at best.
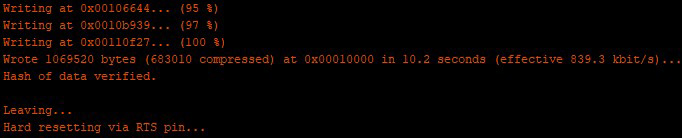
After clicking on the arrow to the right, Arduino IDE compiles the program code and transfers it to the ESP32-S3 board. The ESP board then restarts itself.
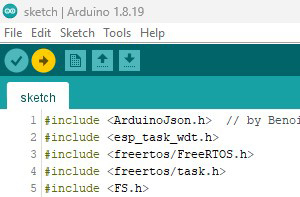
A successful code transfer should look something like this in the status bar of the Arduino IDE.
Completing the display setup and using the display …